Create a new project with an automated initial tailoring
Introduction
The creation of a project is the prerequiste to create tailorings. During the creation of a project an inital tailoring will be created using the provided project perimeters and selection vector.
Step 1: Start project creation wizzard
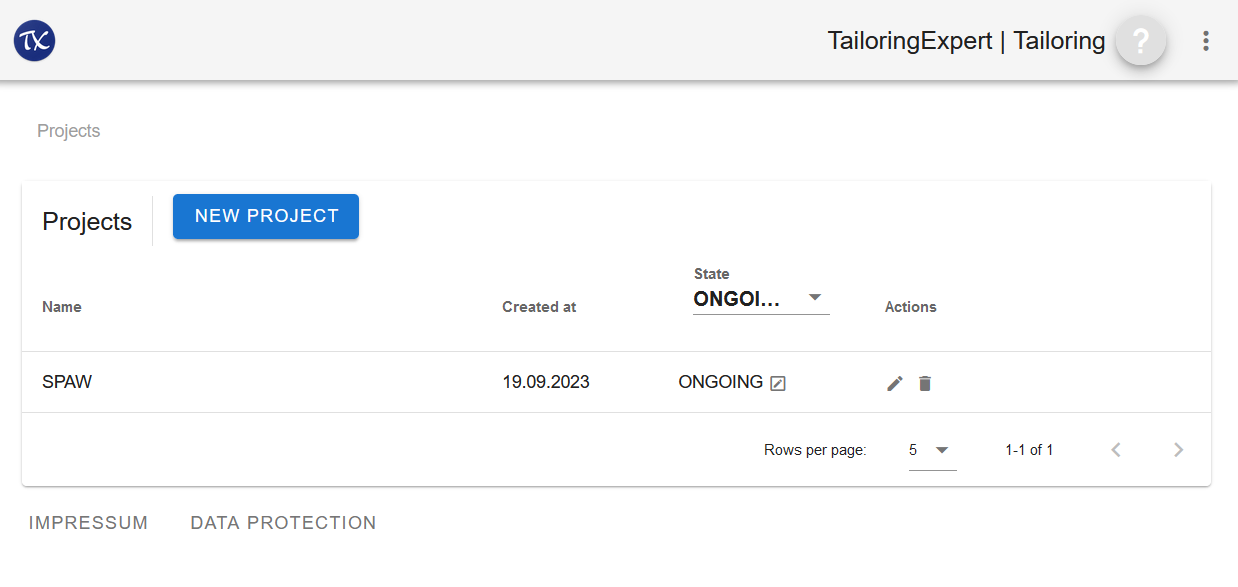
Actions
- Click NEW PROJECT
Step 2: Catalog selection
The first step is to select a catalog version that will be used to create the tailoring.
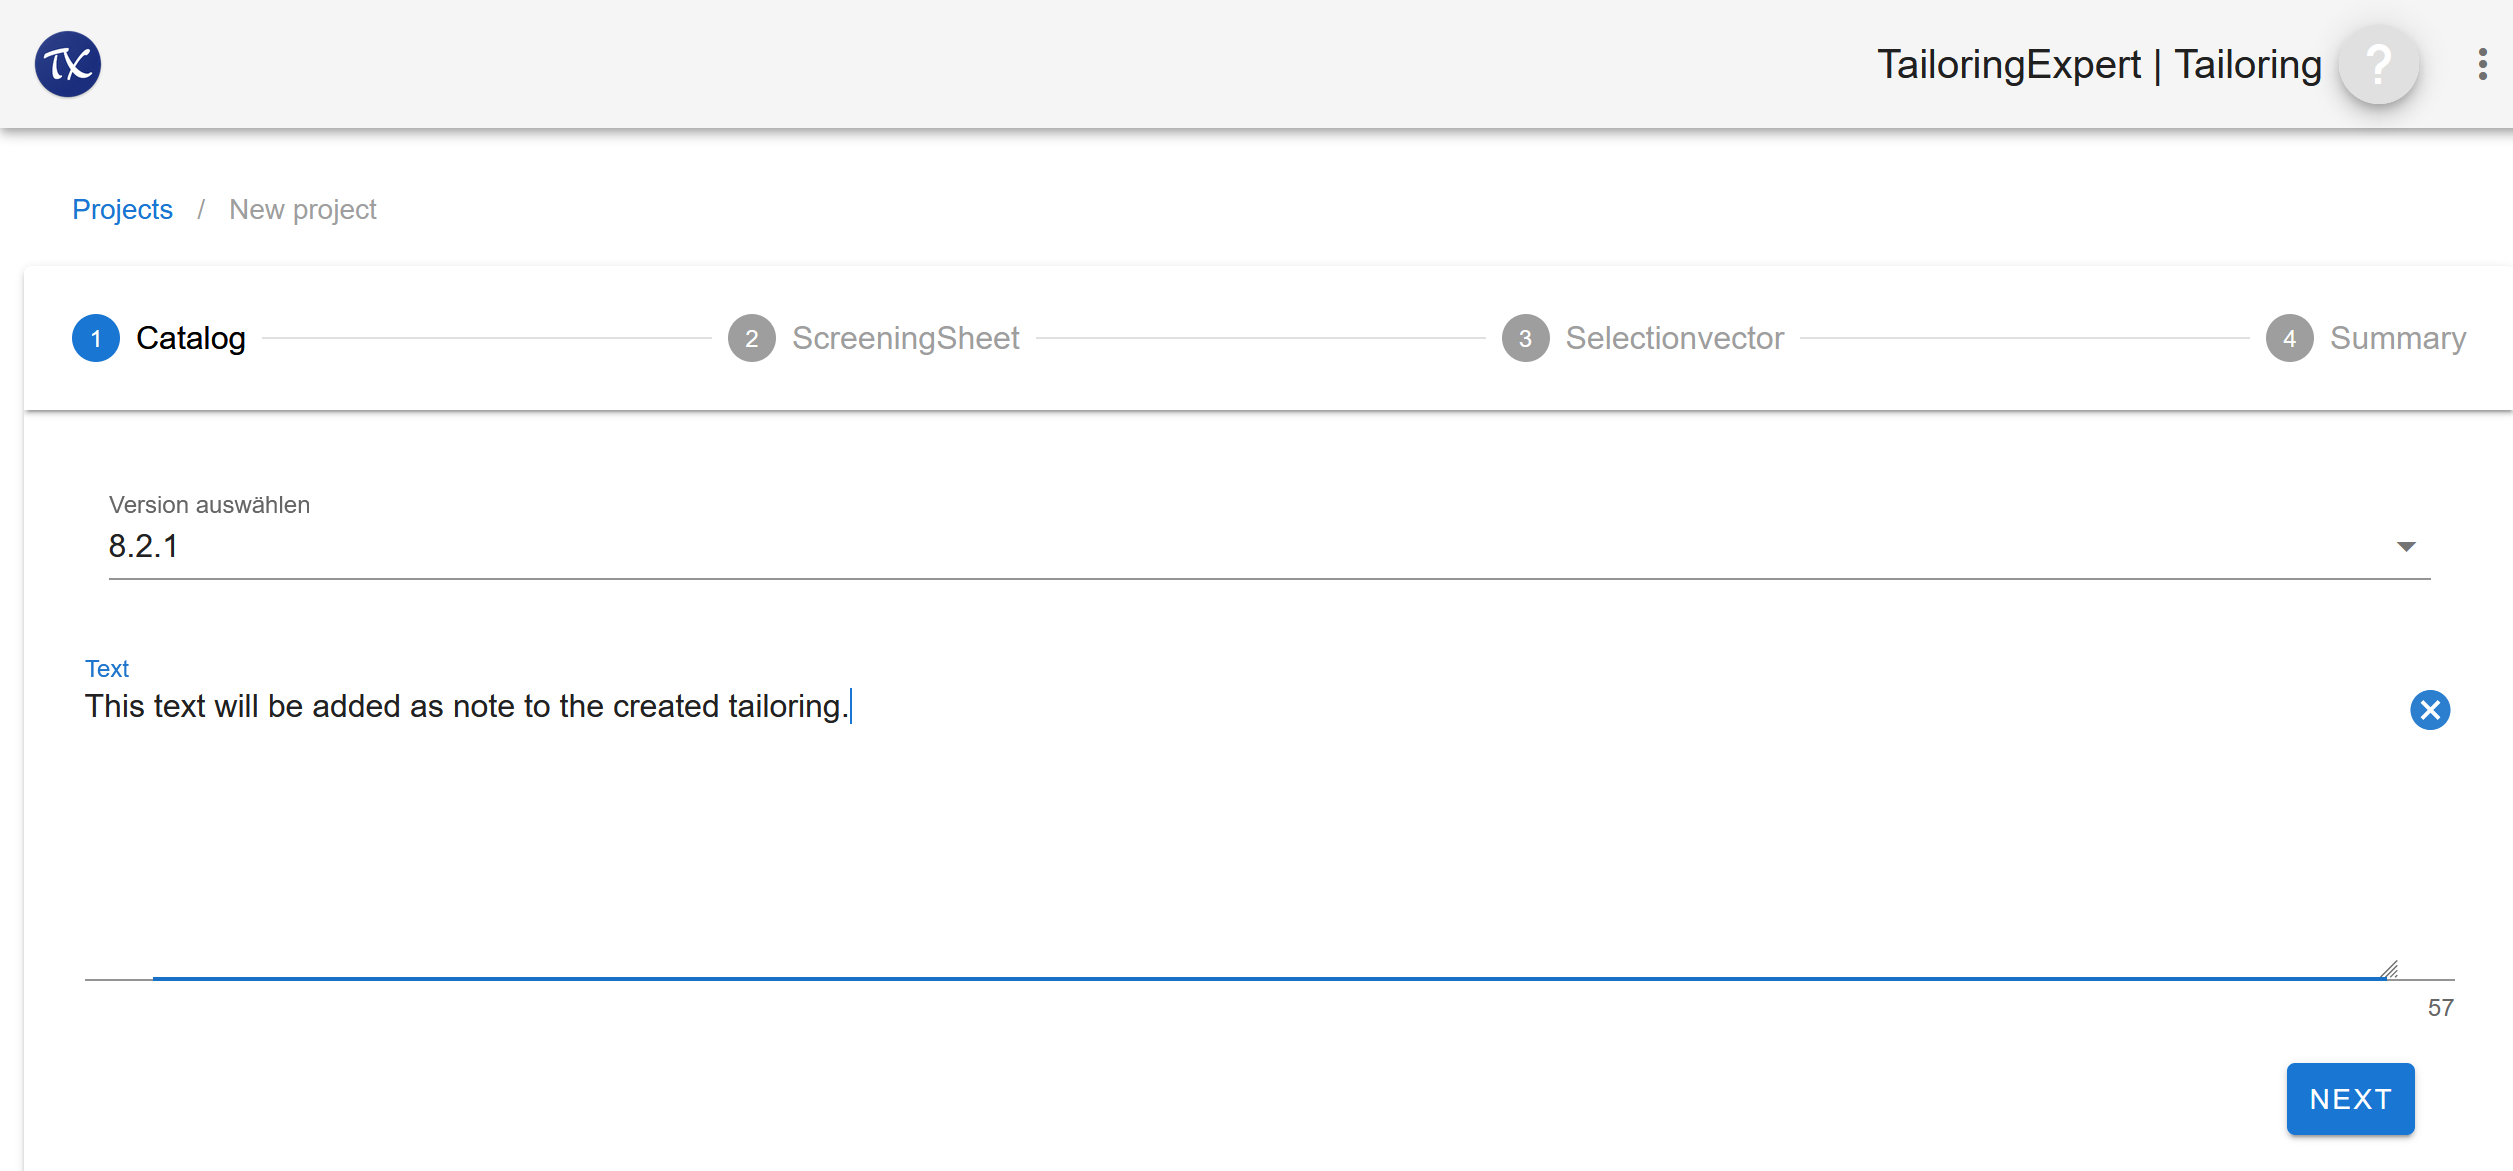
Actions
- Select a catalog version
- optionaly, add a note
- Click NEXT
Step 3: Upload a screeningsheet
This step uploads the project perimeter in the form of a PDF screening sheet file.
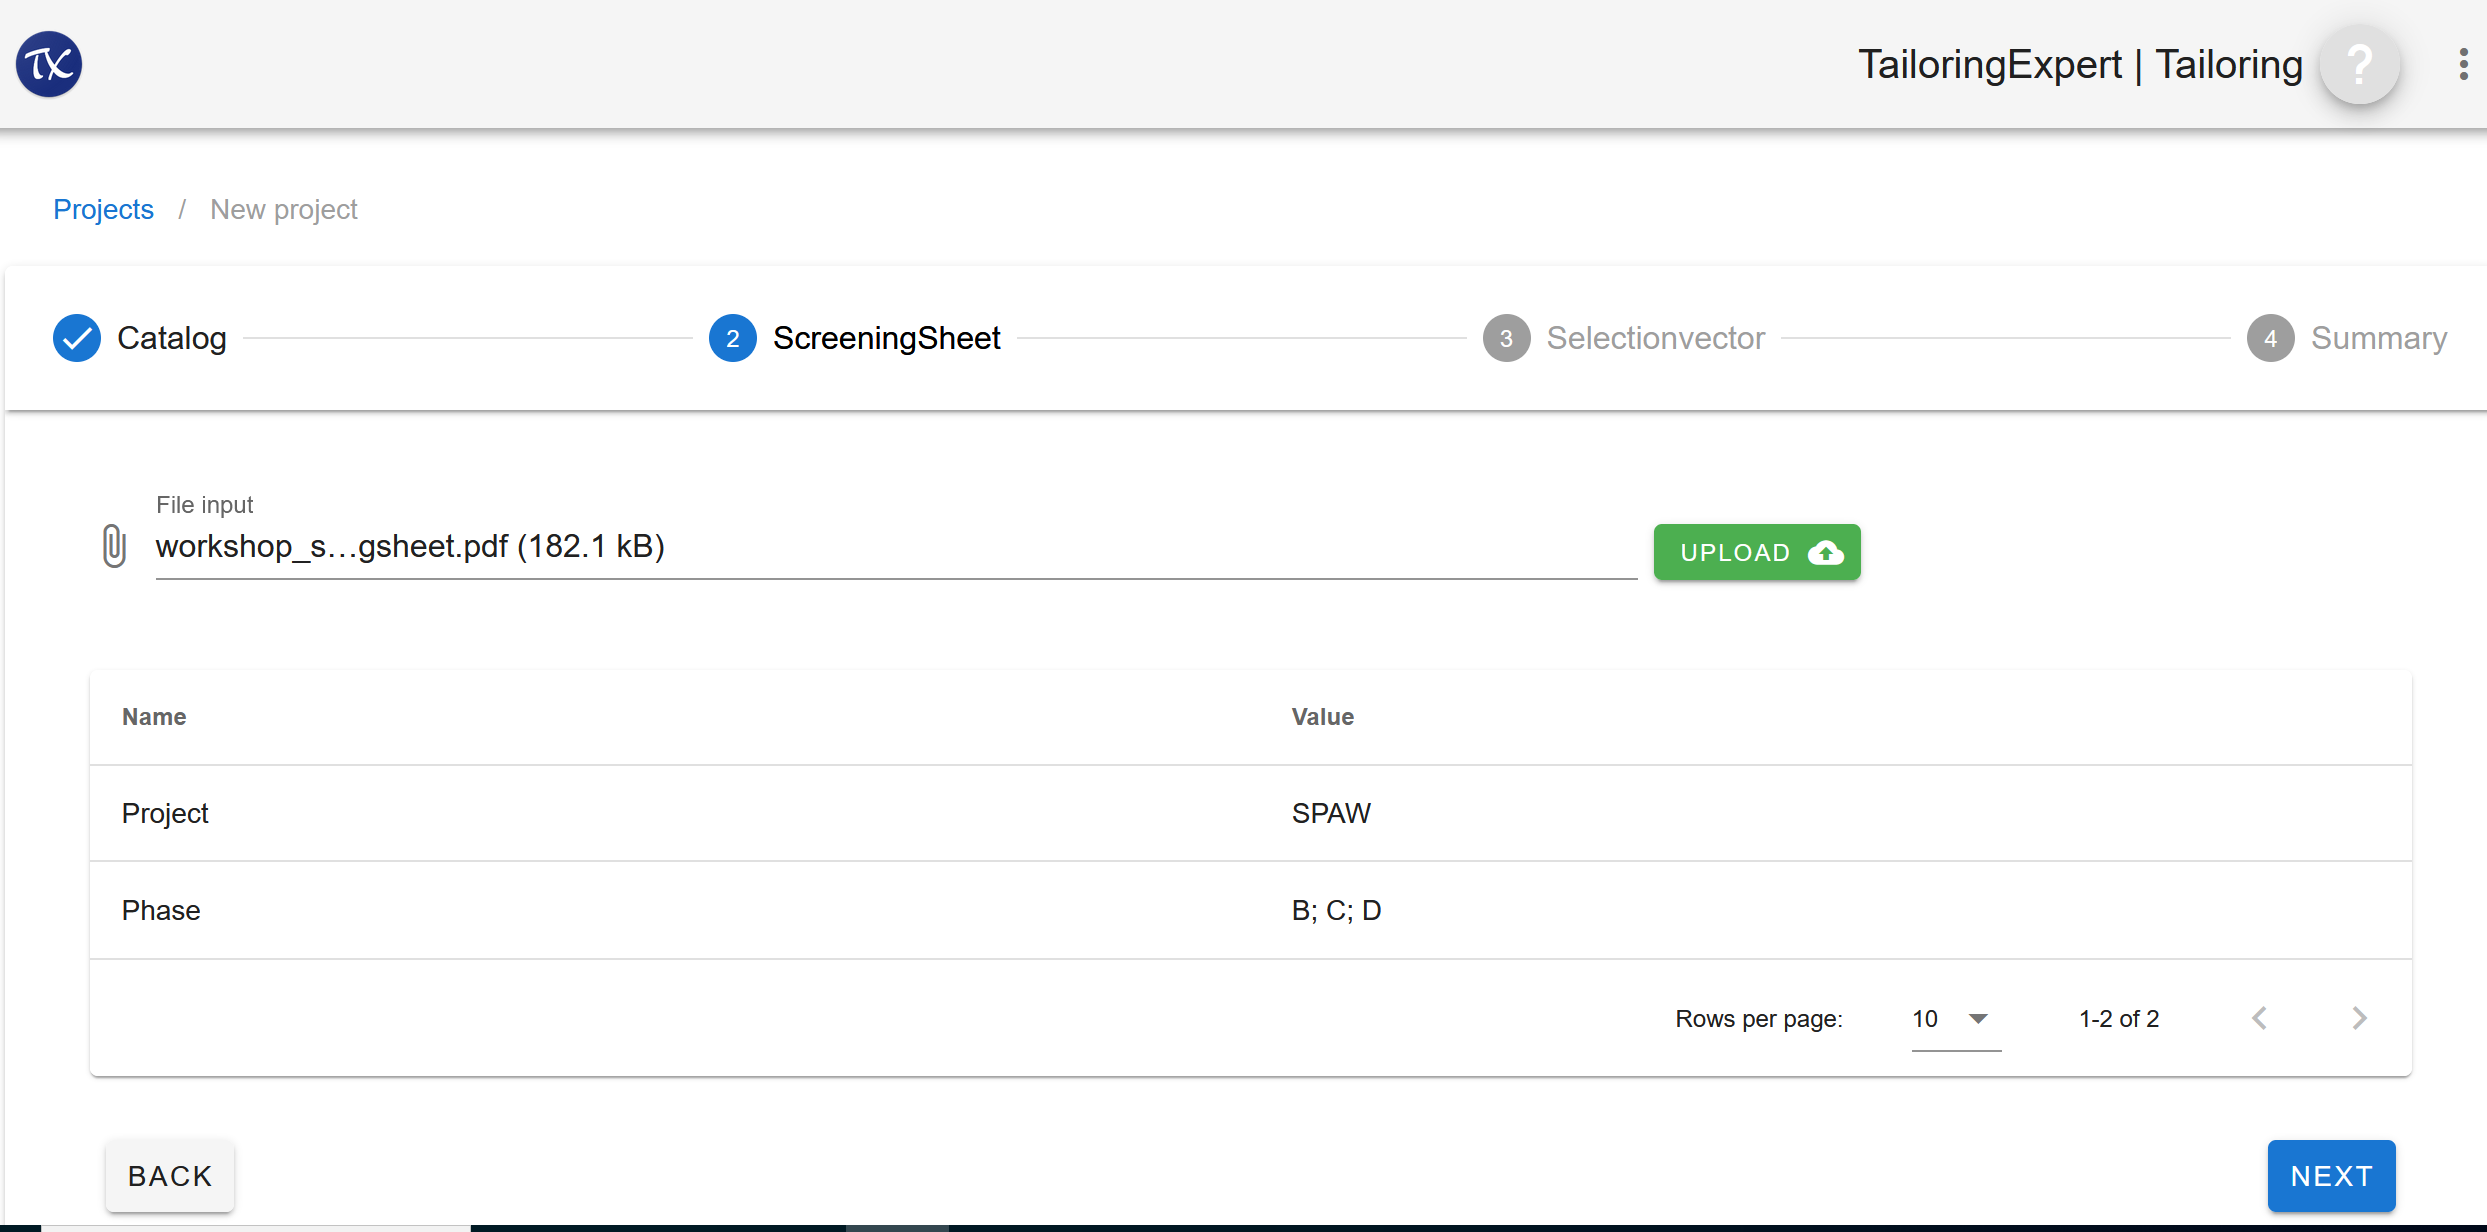
Actions
- To upload a screeningsheet click into the field near to the pencil icon and select a screeningsheet pdf.
- Click UPLOAD to upload the file. Evaluated screeningsheet data will be shown.
- Click NEXT
Step 4: Check calculated selectionvector
In this step the calculated selectionvector is displayed and its values can be changed.
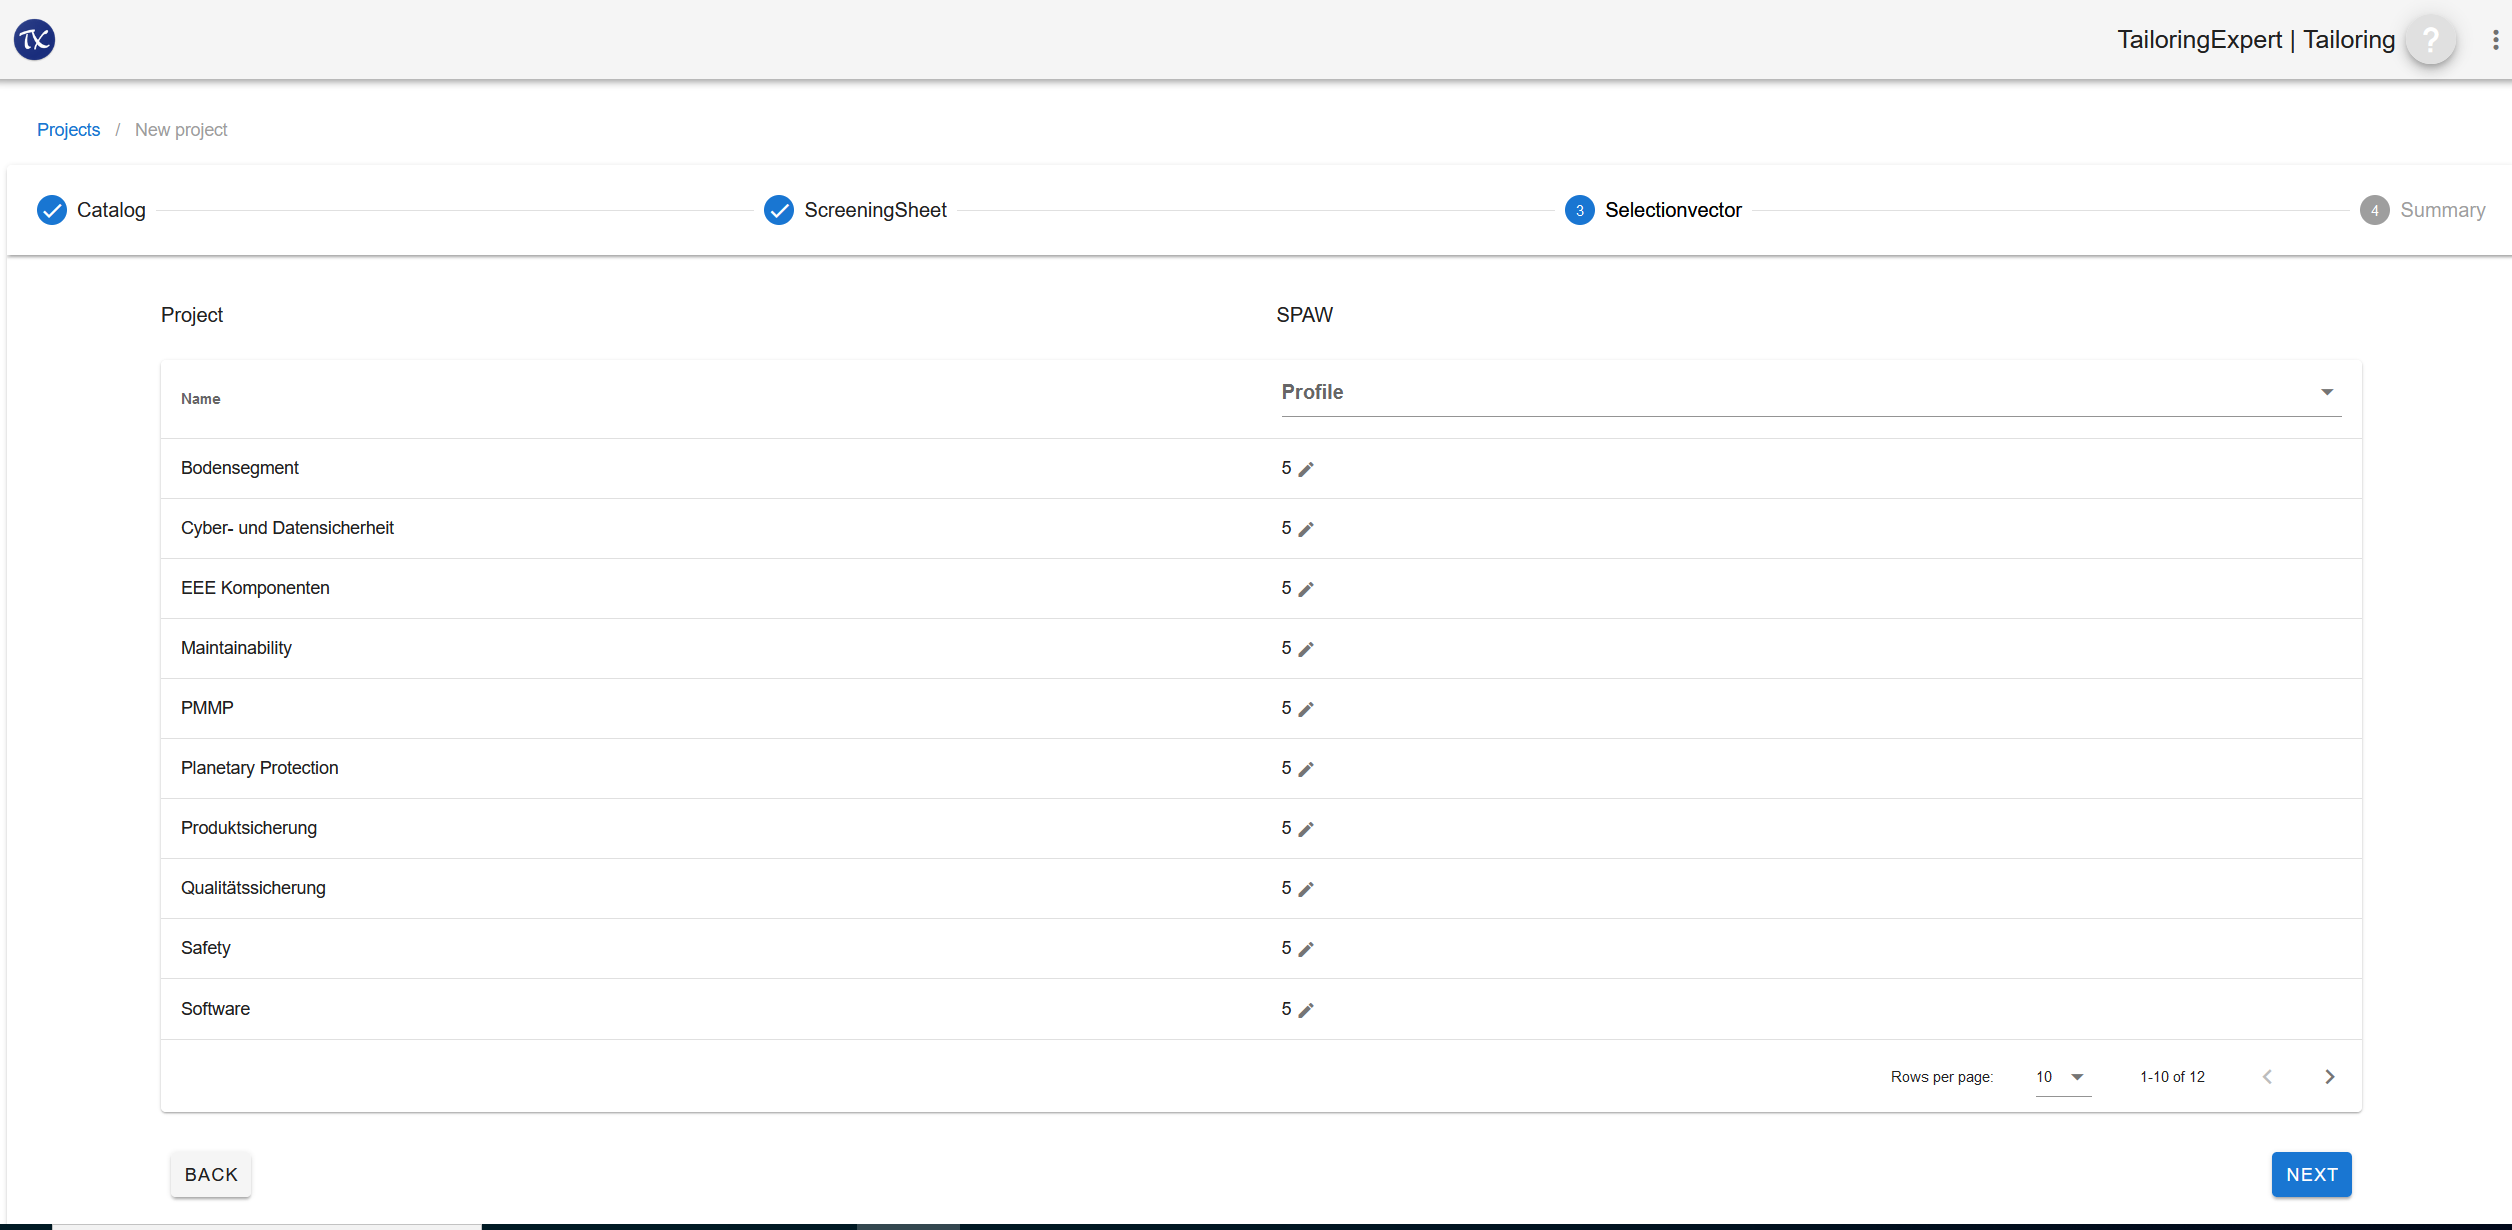
Actions
- You can change all selectionvector values by selecting a profile or
- Change single value(s) by clicking the pencil and enter a new value (0-10)
- Click NEXT
Profiles and selectionvector are highly tenant specific. The demo platform only provides a minimalistic example.
Step 5: Compare calculated and modified selectionvector
The comparison between the calculated and the applied selectionvector is displayed for information.

Actions
- If you like to change some value, click PREVIOUS to get back to the previous page
- Click CREATE PROJECT to create a project with an inital tailoring based on the provided selectionvector
Step 6: Project tailorings
All tailorings of the project will be displayed. This screen is the starting point for modifying or creating documents of project tailorings. It is also possible to add new tailoring to the project
Actions
Will be part of other page.